After you set up your Lazada seller account, it is now time to sell! I’ll be going through what you’ll need and share best practices to get that perfect product score to rank higher on search results and increase sales.
If you haven’t signed up for a seller account yet, check out my guide here!
Here’s what you’ll need to prepare:
- Product Details (Name, Price, Quantity, Variants, Weight, Dimensions)
- Product Description
- Photos
- Video
Before we start, the main idea is to put in as many accurate information possible into your product listing. This saves time for both you and the customer, as you would avoid having back and forth messages for those small details.
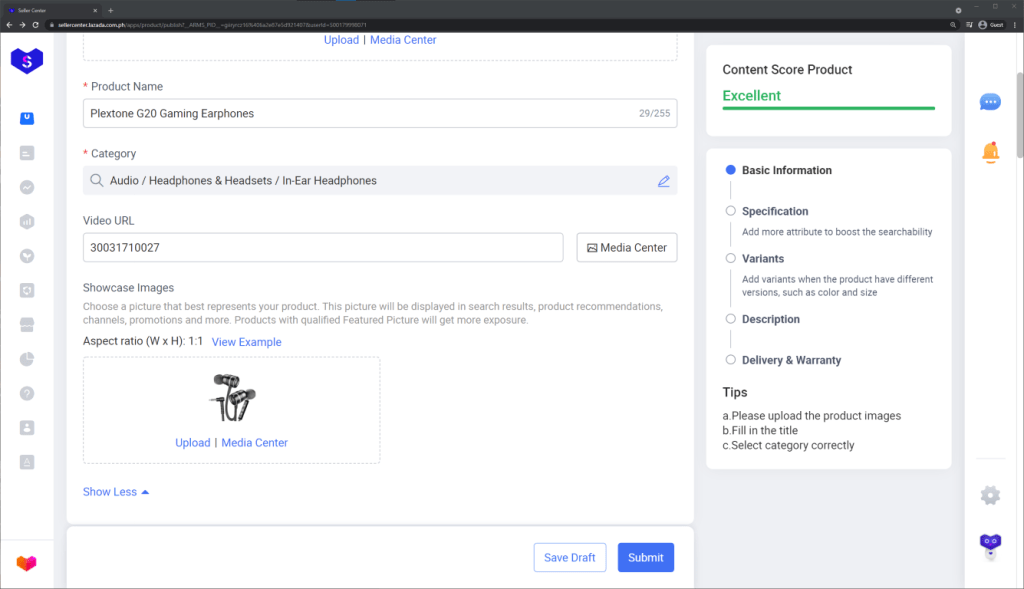
All set? For today’s example, the new product that I will be listing is an earphone. On the Seller Center homepage, head to the left menu and go to Products > Add Products:
Here, you’ll be asked to input the Product Name. Once you type it in, Lazada will automatically make suggestions on the appropriate product category, but you can still select it yourself if none of the suggestions are correct.
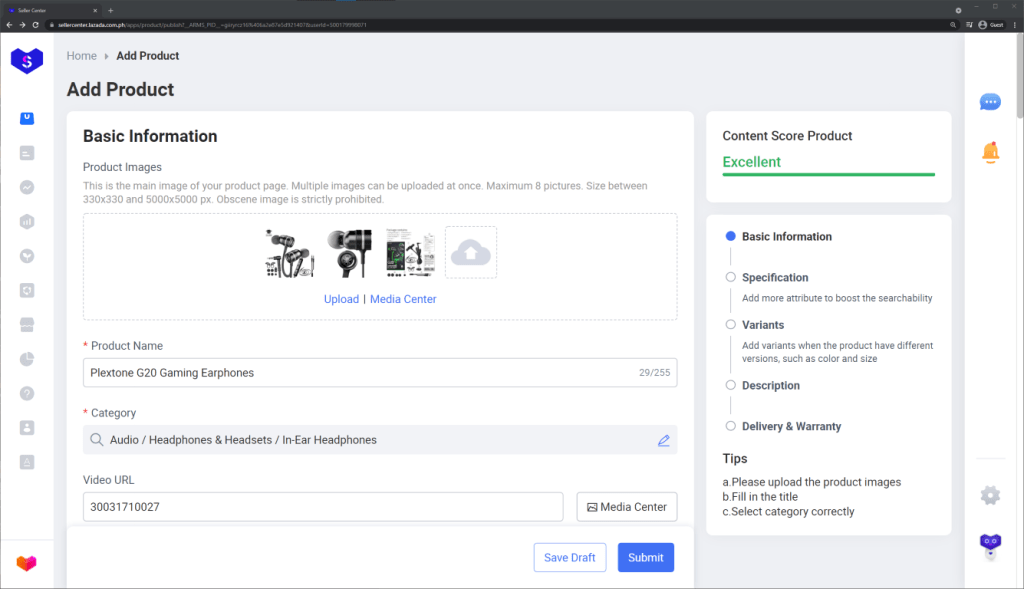
After you choose the product category, the other fields will now show up. Let’s start with the product image. Simply click on the Upload, and select your product photos. To increase product score, you have to upload three images here.
Next, we’re going to add a product video. You have two options here: either input a Youtube video URL or upload your own video via Media Center.
Below this, there is a button that would expand the allow you to upload a showcase image. This image is what Lazada use for various promotions throughout the platform, and it would be recommended to have it focused on the product with a plain background.
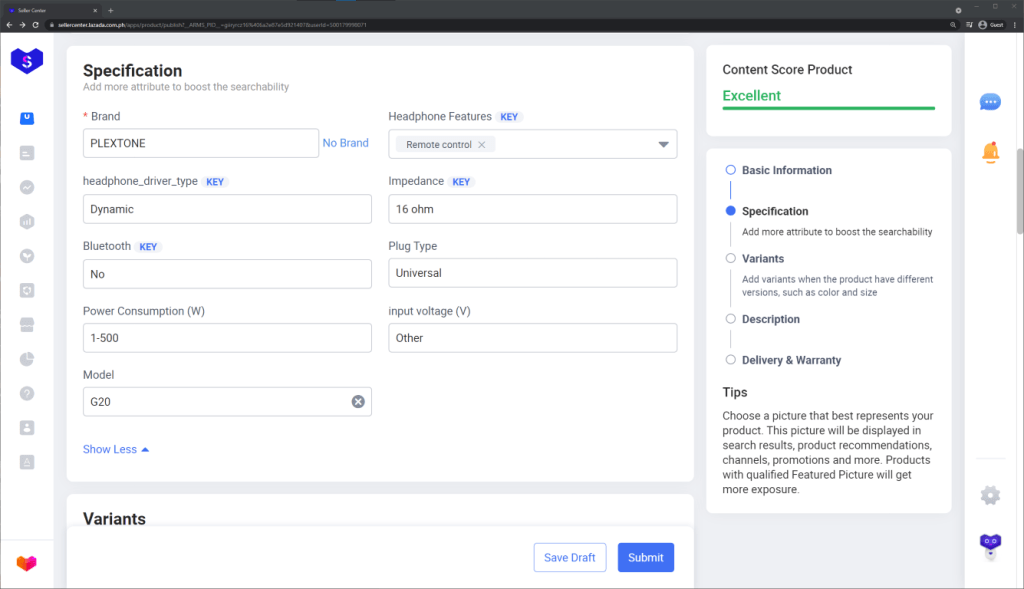
Moving on to the next part, we have the specifications. These fields would vary depending on what your product category is, and to get higher product score you have to make sure that the ‘Key’ fields are filled in. It would be best if you can fill in all fields, as it would increase the chances that your product will show up on search results for users that use product filters.
Now we’ll head on to the product variants. Again, this would depend on the product you’re uploading, but the most common would be color and size. This part is optional as well, so if you don’t have different product variants, you may skip to the next step.
For those that would add variants, you can add up to two variants. An product that could use this would be mobile phones, one variant could be color, and the other could be storage size. Simply click on Add Variation, input your variant name and list the options. There is also an option to add images per product, and I would highly recommend doing so to help customers distinguish one from another, and prevent them from ordering the wrong variant.

Next, we’ll add in the variant information. There are two price fields, ‘Price’ and ‘Special Price’. These would be used to display a corresponding discount on Lazada, and it is common practice to have your products have a Special Price for all of the time. It is up to you on how much you would set the ‘Original Price’ to be, but I would highly recommend to set it to a realistic amount. For example, having a constant 90% off on your product may have some customers think of it as unrealistic and you may come as disingenuous.
After you fill up the quantity per variation, next would be SellerSKU. SKU stands for Stock Keeping Unit, and it is highly helpful for managing your inventory. Depending on your products, you should set up a structure that would categorize your products into easily recognizable SKUs.
For example, the structure that I would usually use is Brand-Model-Color, and for our current product it would be PLEXTONE-G20-BLACK. Another example for those that might sell clothing products, you can use ProductType-Size-Color-Design, and for mobile phones it could be Brand-Model-Color-Storage. I cannot emphasize how important this is for inventory management and analyzing your data, so make sure to use a consistent SKU system.

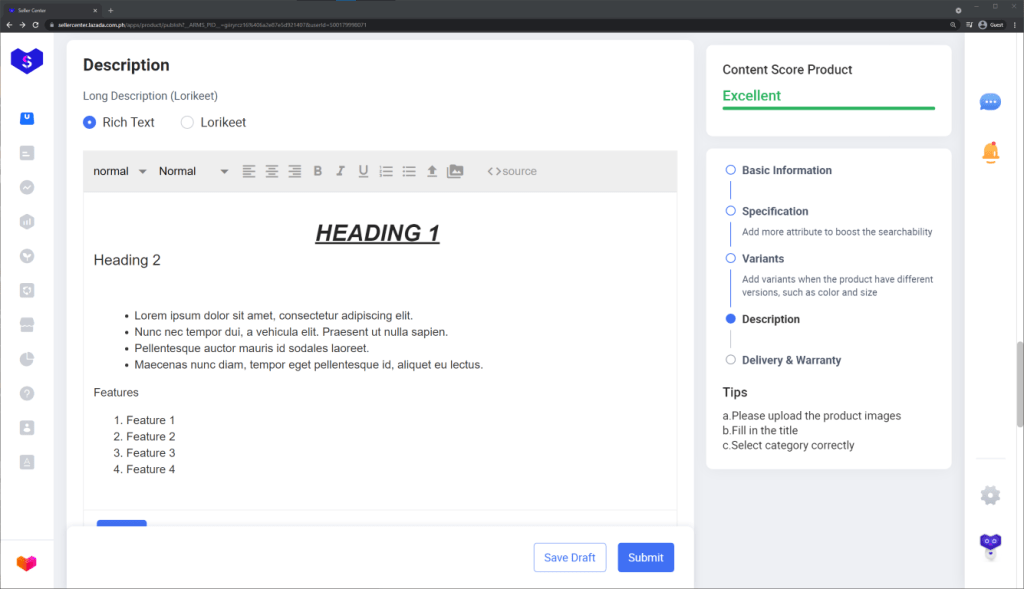
Next up we have the product description. There are two options to choose from, Rich Text or Lorikeet. Rich Text has a simpler interface and is easier to use, but I personally use Lorikeet for better customization options. Whichever one you choose, make sure to put in at least 30 words and upload at least 1 photo to increase product quality score.
For this example, I’ll be using Rich Text. You can customize various text attributes, and you can upload a photo by using the arrow icon on the left side. If you are knowledgeable on HTML code, you can click “<>source” to customize it to your needs.
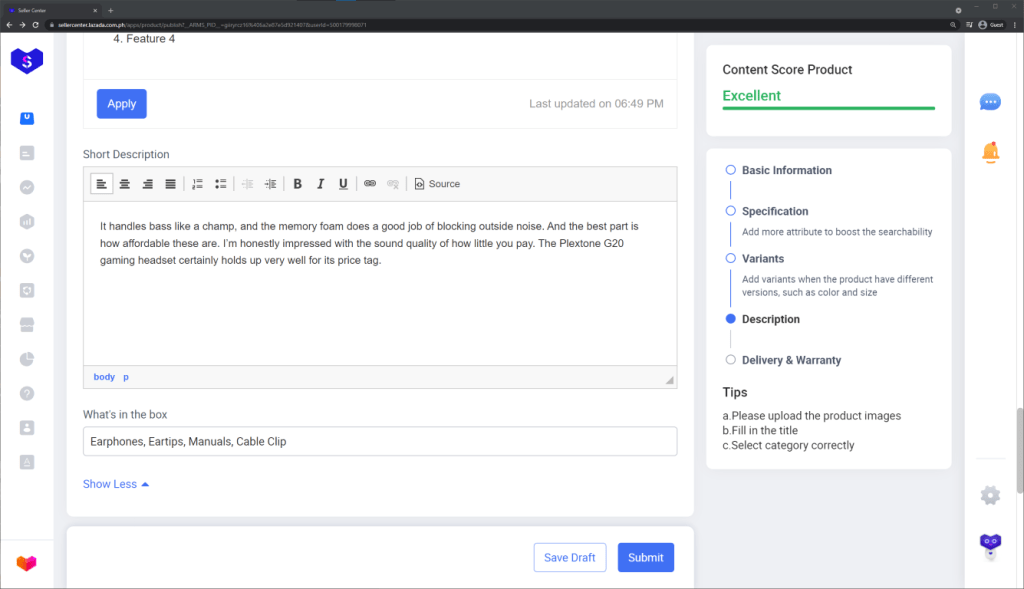
By clicking “Show More” below, you can also input a short description which is pretty much same as Rich Text, but it will show up above your long description. Below this would be “What’s in the box”, just list here all the contents, each separated by a comma.
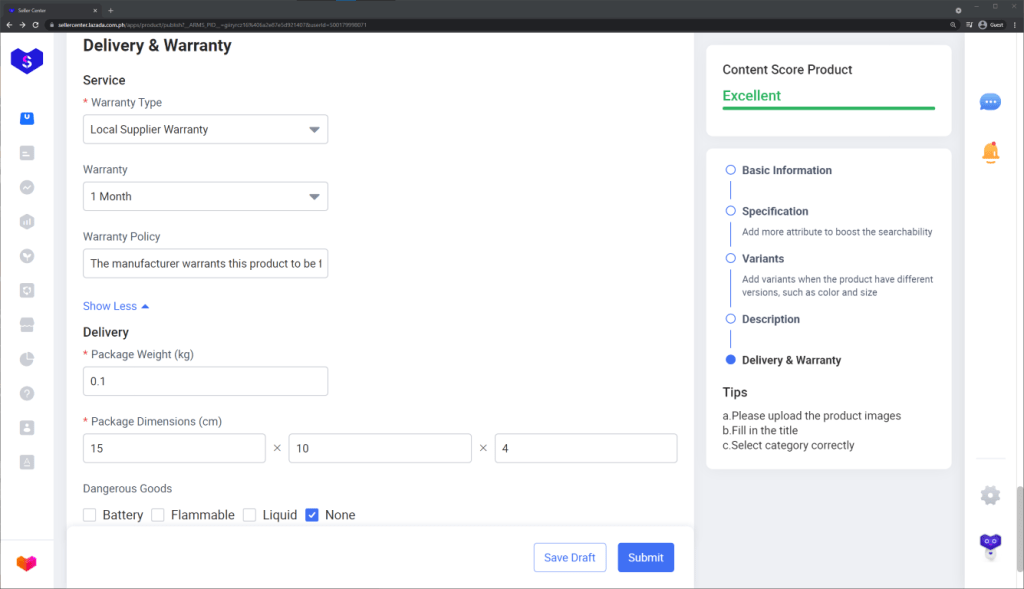
Almost there! The last part would be Delivery & Warranty. Most of these are self-explanatory, under the Warranty Type field you can click “Show More” to put in more details such as Warranty Period and Warranty Policy.
All done! If you completed all steps, you should now have a perfect product score. To further improve your listing, here’s some additional tips:
- Product Name – Some sellers may think that putting in all your target keywords into the name will lead to your product ranking higher in search results, but this is not the case. Keep it short and concise with only the relevant keywords, and put all other keywords into your description.
- Dimensions/Weight – Make sure to indicate the dimensions/weight after you pack the item (e.g. put bubble wrap or other packing material). I would also recommend increasing the values by at least 10%, to lessen the chances of being overcharged on shipping fees.
- Size Variations – If your product variations would involve different sizes (e.g. bed sheets), they would likely have different dimensions and weights. If there is little difference between variants, you can simply put in the details of the largest one available. However, if the discrepancy between variants is too far apart, I would suggest creating different products altogether. The reason is customers may complain about more expensive shipping fees for the smaller variants.
- Warranty Page – The Warranty Policy field only allows one straight line of text, so it may be difficult to put all the details here. A different option would be to create a custom Lazada page, then put the link in the field instead (tutorial coming soon!).
I know that is a lot of steps and can be quite exhausting to do if you have a lot of products, but it is very much worth it. With thousands of people possibly going to view your products, having a great product listing will increase your conversion rate and lead to more sales.
If you have any questions, feel free to comment below!